Italians hold a love of coffee close to the national heart. They introduced the drink to the rest of Europe from Egypt. Venice opened its first café around 1683.
We all have our own favourites; espresso, cappuccino, latte, flat white or some other variation. Some like more milk. Others dabble (sacrilegiously?) with chocolate or caramel. There are so many ways to enjoy your coffee in Italy, and methods to brew it Italian style even after you’re back home from a stay at one of our villa rentals in Italy.
Method 1: Moka Pot

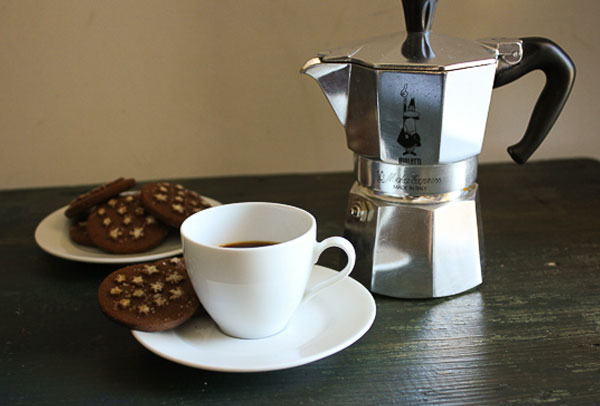
For the Moka Pot you need the coffee ground fine, almost like table salt. The size of the pot determines how many cups you get out of it. Use roughly 4 grams of grounds per cup.Boil some water and fill the bottom of the brewer. Then insert the filter basket into the bottom, fill with your coffee and level it off with a finger.
Screw the top onto the base (be sure to take care handling the bottom with all that boiling water) and place the pot on a stove at medium heat. Any hotter and the coffee burns. Slowly, as the water boils, steam from the bottom of the brewer is forced up through the finely-ground coffee and into the reservoir above, where it collects.
When the bottom section is almost empty you’ll hear gurgling noises and see any liquid leaving the spout has turned the colour of honey. When this happens, remove the Pot from the stove and keep the lid closed. When you’ve used your Moka Pot a few times, you’ll have the timing almost automatic. Now you’re ready to serve up your coffee, adding milk or hot water — or whatever you like.
Rosemary Molloy of An Italian In My Kitchen likes a Moka Pot for her morning coffee:
“I use a Bialetti Moka Express coffee maker (in my opinion the best brand of Italian coffee makers you can find) which makes about three cups of coffee. The brand that I always use and I suggest is Lavazza ‘Crema e Gusto (Gusto Dolce)’, because it has a non-bitter taste to it and it’s lighter than other Italian espresso brands.”
Method 2: Aeropress
 For an Aeropress you use about 15 grams of finely ground coffee (as fine as for the Moka Pot)... and be sure to have a timer ready.
Fully extend the plunger and place the unit upside-down; it should reach number “4” on the unit. Like other methods, boil some water and let it cool slightly, to pre-heat the whole assembly by running hot water through it.
Pour in your coffee and set a timer for 1 minute. Start the timer and pour in hot water until it reaches the “3” mark. Stir the coffee before filling the Aeropress to the “2” mark. Place the filter and cap on top, verifying it’s screwed on tightly.
Take extra care as you invert the Aeropress over the cup; make sure you do it slowly and your cup is sturdy. After this, press the plunger down and the coffee is done.
One of the main strengths of the Aeropress is super-portability. Charles Stewart of 5 Senses Coffee in Australia never travels without his: “This clever little device creates a brew which displays the flavour qualities of filter coffee whilst being able to replicate the strength of espresso for people who are taken by milk. Besides this, it is relatively easy to use and clean. If you fancy yourself as a bit of a scientist, the Aeropress begs you to explore the different ways you can brew coffee.”
Method 3: French Press

For a French Press (or Cafetière), coffee grounds should be coarser than for a Moka Pot.Pre-heat the cafetière with boiling water and allow it to rest for a minute. This should be long enough to warm it to improve blending, but also to ease the intense heat of just-boiled water, helping avoid burned and bitter coffee.
Add your coffee (about 10g per intended cup) and then slowly pour in hot water, stirring gently with a wooden spoon so coffee “blooms” to the surface. Place the lid on and let it brew for about 4 minutes before gently depressing the plunger and serving. You may want to decant coffee now to prevent it “over-brewing” and becoming bitter.
Bethan Vincent, founder of Vincent’s Coffee, shares a couple of tips:
“It’s better to buy whole beans and grind them at home if possible, as this ensures the freshest coffee. It’s worth investing in the highest quality coffee equipment you can, as it lasts longer and gives better results. If you buy a coffee out every day, over the long term you can save quite a bit of money making it at home.”
Method 4: Chemex

If you have a Chemex, you should use regular/medium ground coffee, which is between coarse and fine, with about 7 grams per cup of coffee. Place the square filter into the top of the Chemex and bend it to form a cone. One of the sides should have three layers, which should be placed facing the spout.Boil some water and let it cool for about 20 seconds. Rinse the filter with a small amount of boiling water and pour away. Doing this helps with the blend and preheats the container.
Place your coffee in the filter, then pour enough water to saturate the grounds. This lets them “bloom”. After a short time, begin to add the water gradually.
You’ll see coffee pooling at the bottom of the Chemex, so keep adding water gradually until you reach the desired amount. Once done, remove the filter and you’re ready to serve.
Keep in mind a Chemex gradually loses heat. Transferring brewed coffee to a thermal flask, or only making the required amount, is the best solution to avoid wasting coffee. Paper filters are common, but you can also buy reusable, stainless steel filters to help avoid the disappointment of rising for a morning brew... only to realise you’ve run out of filters.
